Page Types
One usage of the custom attributes is to define what kind of page you are creating.
Shopify uses a very specific page structure to create a template, and you can create all the type of pages simply adding some custom attributes on the body element of your page.
Shopify Pages Structure
Shopify can be used with unlimited pages but you are forced to create some pages, that we will explain below. Without these pages the Adapter will not try to convert at all your template, not because he can't, but because Shopify will not allow you to upload the theme.
These pages below are mandatory, so never forget to create them (even blank 😉):
- Index: for real? yeah index page is mandatory;
- Cart: Webflow Ecommerce uses only the mini cart flow, while in Shopify is mandatory to have a page where cart items are shown;
- Blog: Shopify forces you to create a blog page, we don't know but in Shopify only 2 CMS types exists: Article and Product, and you are forced to create pages for both of them. (And no! you can't create custom types for the CMS in Shopify!);
- Default: Shopify allows you to create pages from the dashboard, Default is the layout that is used by default when you create a new page in Shopify;
- Collection: Collection is the page that shows all product in a Collection;
- Product: Product is the page that shows the specific product;
Yeah the last 2 were pretty much provided (Shopify is only an eCommerce, so if you don't show products, why you want to use it?!) but better be clear!
So how you can define a page? 🤔
You have to keep in mind only 1 attribute
It can be simply defined on Webflow adding the following attribute on the Body element:
pagepage typePage type can have different values and below you will find a list of all pages divided per functionality.
Blog Pages
There are only 2 pages to create for the Blog to work finely:
Blog Page
This is the page where all articles of a Blog will be shown (Note that in Shopify you can have multiple Blogs! No categories though 😞)
This page can be defined using the following attribute on the Body element of your page:
pageblogArticle Page
This is the page where a single article is shown:
This page can be defined using the following attribute on the Body element of your page:
pagearticleAlternative Templates
Since you can create multiple blogs you can create alternative templates both for Blogs and Articles, using respectively these attributes on Body:
pageblog-templateand
pagearticle-templateThe name of the template will be the name of the page you created in Webflow, and you will be able to select the template from each article/blog

Shop Pages
There are several pages you need to create to get a fully functional Shop in Shopify:
Collections List Page
This is the page where all collections of your shop are listed. This page can be defined using the following attribute on the Body element of your page:
pagelist-collectionsCollection Page
This is the page where all products of a Collection will be shown. This page can be defined using the following attribute on the Body element of your page:
pagecollectionProduct Page
This is the page where a single product is shown:
This page can be defined using the following attribute on the Body element of your page:
pageproductCart Page
This is the page where all items in the cart are shown:
This page can be defined using the following attribute on the Body element of your page:
pagecartGift Card Page
This is the page where a single gift card is shown, This page is not linkable, and can be accessed only through email.
This page can be defined using the following attribute on the Body element of your page:
pagegift-cardAlternative Templates
You can create alternative templates both for Collections and Products, using respectively these attributes on Body:
pagecollection-templateand
pageproduct-templateThe name of the template will be the name of the page you created in Webflow, and you will be able to select the template from each collection/product
Account Pages
⚠️⚠️ Shopify by default has no customers functionality enabled! If you create This page will still not able to use them if you don't enable customers from Shopify Settings! Follow the official guide
Account Page
This is the personal page of your user, here you usually should add a list of orders made by your customers and links to his addressess This page can be defined using the following attribute on the Body element of your page:
pageaccountLogin Page
This is the page where your customers can login and usually also request a new password. This page can be defined using the following attribute on the Body element of your page:
pageloginRegister Page
This is the page where your customers can register an account This page can be defined using the following attribute on the Body element of your page:
pageregisterActivate Page
This is the page where your customers can activate their account, This page is not linkable, and can be accessed only through email. This page can be defined using the following attribute on the Body element of your page:
pageactivateReset Password Page
This is the page where your customers can reset their password, This page is not linkable, and can be accessed only through email. This page can be defined using the following attribute on the Body element of your page:
pagereset-passwordOrder Page
This is the page that shows the details of a single order. This page can be defined using the following attribute on the Body element of your page:
pageorderAddresses Page
This is the page where your customer can view and edit their addresses. This page can be defined using the following attribute on the Body element of your page:
pageaddressesStatic Pages
All the static page you create in Webflow will be converted as template page. They are not automatically created in Shopify, you have to create manually them from Shopify Dashboard being sure to use the same handle (slug) you used in Webflow. And also don't forget to select the correct template:
The template will have the same name you used in Webflow.
Default Page
In Shopify you can create pages directly from the backend, by default they will get a page called Default, to define your Default page use the attribute:
pagedefaultUtility and Remove
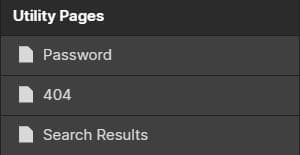
Utility pages like 404, search, password, need no attributes at all.
If you want to not convert a page just add the attribute on body:
pageremoveNote: attributes values should always been inserted as handle, hyphens instead of spaces and all in lowercase
Do's and don'ts
Probably you are now thinking, I have to add an attribute on every page?!? Are you kidding me? 🙃
Well fortunately, this is not the case 😀
The Adapter is smart enough to understand automatically some of your pages. The Utility pages needs no attribute, so no attribute for Not Found, Password, and Search Page.
The Ecommerce Pages needs no attributes and they are automatically used for WooCommerce:
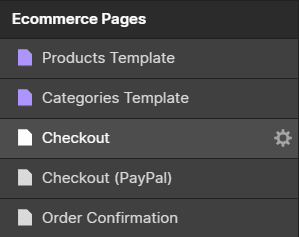
Products Template is used as Product Page
Categories Template is used as Collection Page
Also some CMS Pages are automatically recognized without attributes
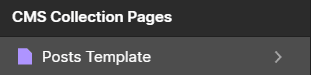
Posts Template is used as Article page (This happens only if you create your collection in Webflow using Posts as plural name and Post as singular name)
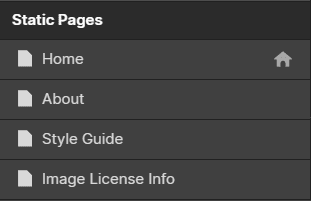
All static pages are automatically converted as template pages (Generic Pages that will be created in Shopify)
READ THIS
Once again you can't use custom types for the CMS, so don't create them in Webflow, you have no way to convert them in Shopify!
What you say about Checkout and Order Confirmation Pages?? They are removed! Shopify doesn't allow you to modify the checkout layout, you can only upload a css file and only if you Shopify Plus (299$+ per month 😐)